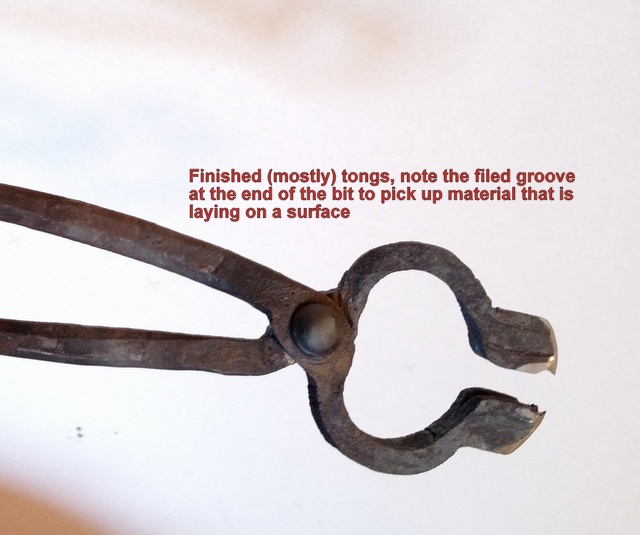
This is how I forged my first set of tongs. I think they came out pretty good, but far from great.
First a bit of terminology:
- Bit= the blocky part that physically contacts the hot metal.
- Jaws= the curved parts right behind the bits.
- Bearing area=the wide area where the rivet is
- Reigns= handles
Now the steps
- Start with 16' of 1/2“ x 3/4” mild steel. I could only find 1/2“ x 1” so I had to draw it down to 1/2“ x 3/4”.
- Make a chisel mark 1“ and 2” from each end on one of the 1/2“ wide faces.
- Make a chisel mark 3” from each end on the opposite 1/2“ wide face.
- Make a chisel mark at the middle of the length.
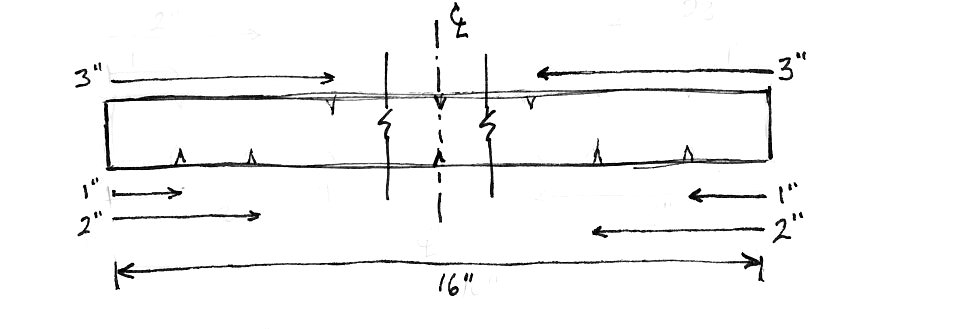
- Notch the 1” and 2“ marks to a depth of 1/4”-3/8“. I used a custom made notching tool built specifically for this purpose. You want to keep the outside edges square.
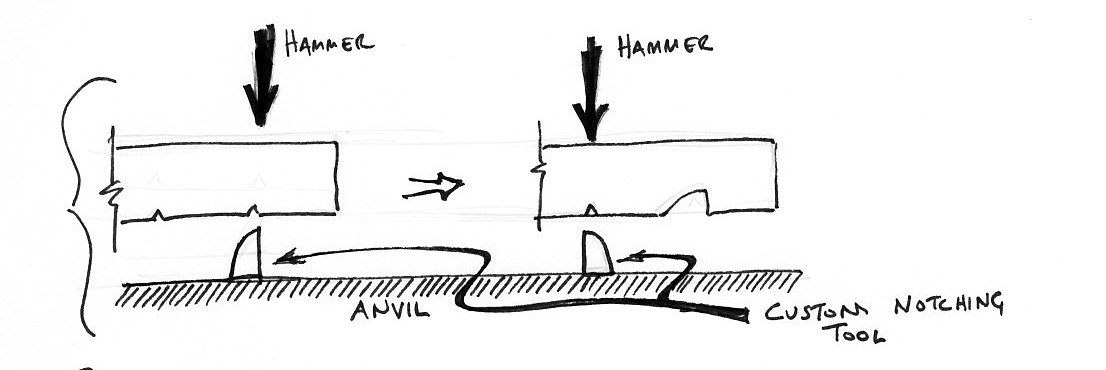
- Draw the space between the 1” and 2“ notches down by 1/4” to 3/8“. You want to keep more than half the original depth.

- Notch the 3” mark just as a place holder.
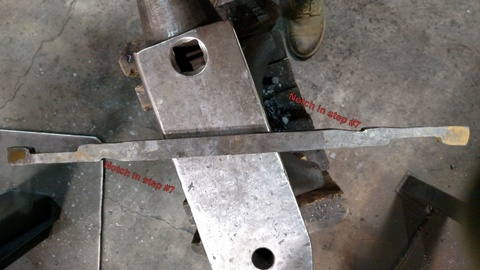
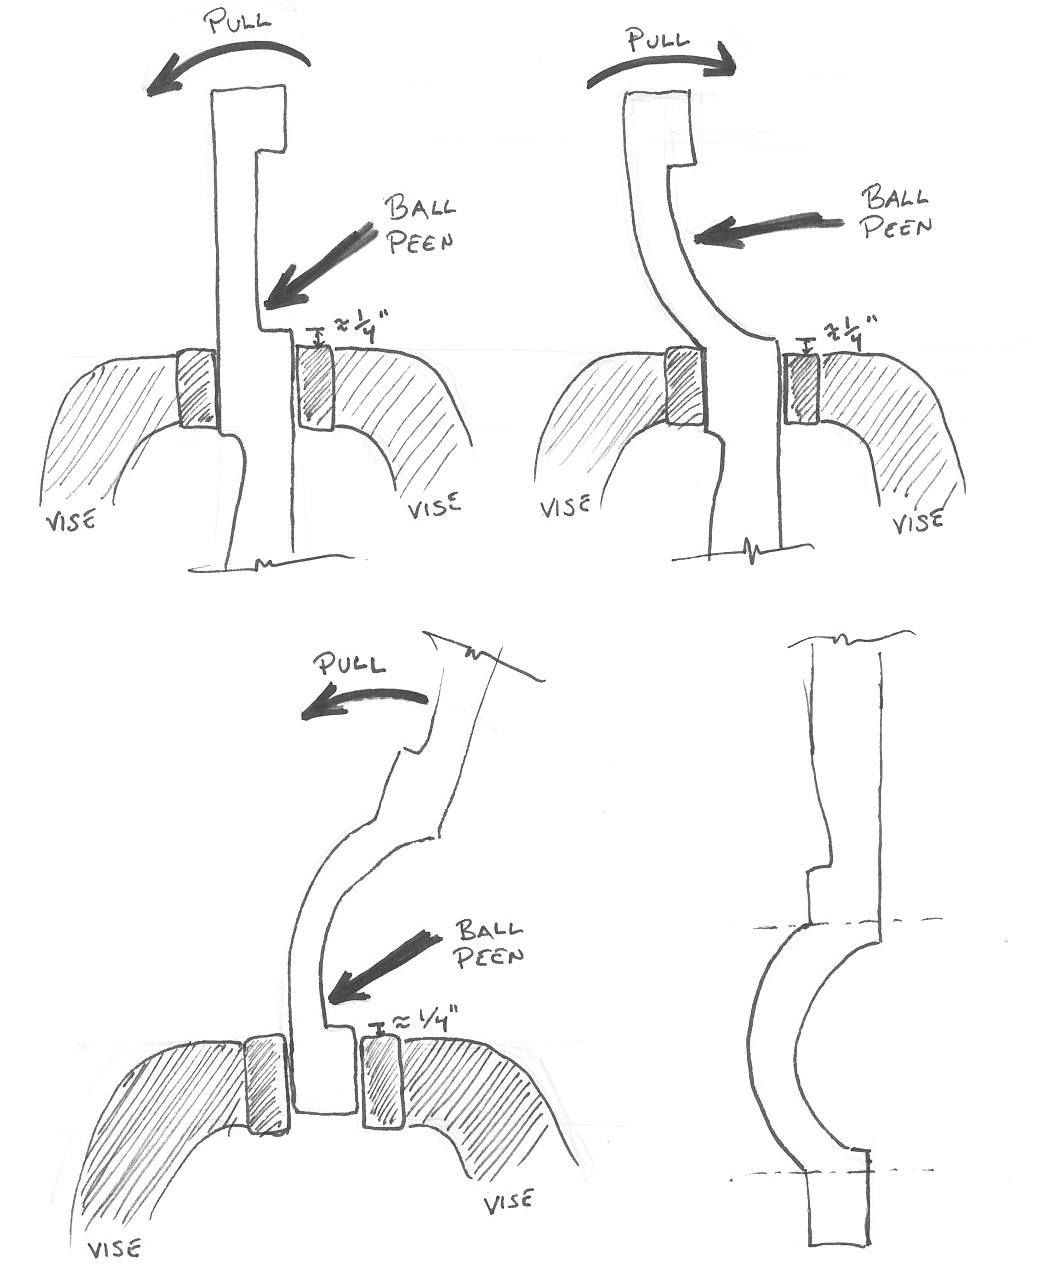
- Secure the piece in a vise and using a ball peen hammer shape the jaws as shown.
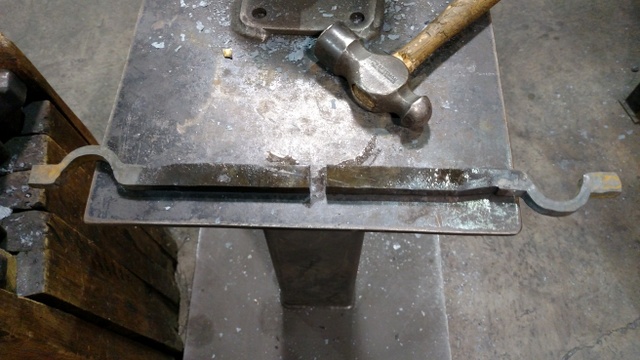
- Cut the piece in half at your original center mark.
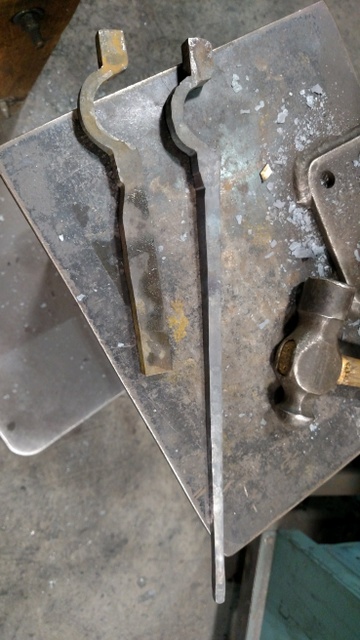
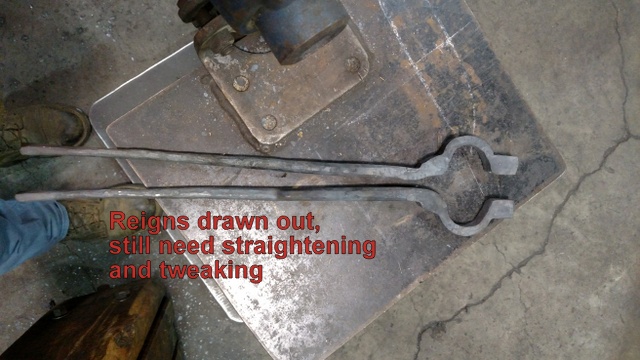
- Draw out the reigns to the desired length and width.
- Offset the handle from the bit by placing the bearing area over the edge of the anvil and using heavy blows.
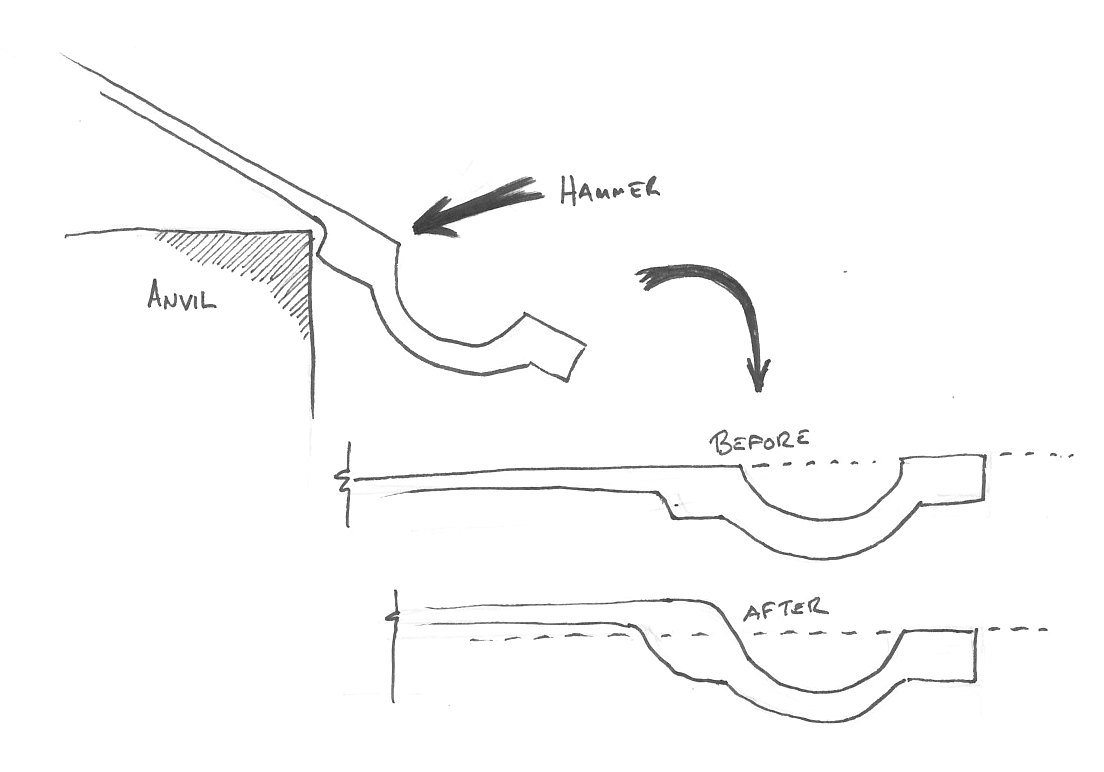 Keep the handle straight by occasionally laying it down on the anvil and straightening it.
 - Create the offset between the reigns, bearing, and bit but heating each piece and squeezing it in a vise with an offset jig like this.
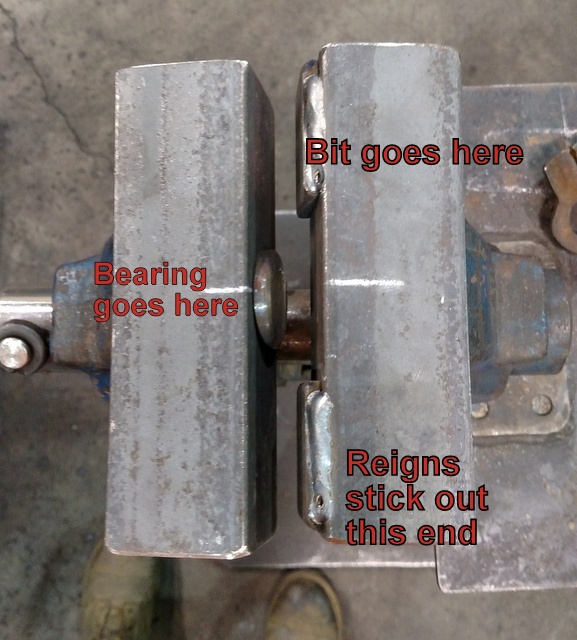
- Create a lenght-wise notch in the face of the bit by clamping the bit in the vise and chiseling from the jaw to the front in several heats.Just clamp the bottom 1/4 or so of the bit very tightly, you want the top to spread as you work it. Keep the cut as centered as possible.

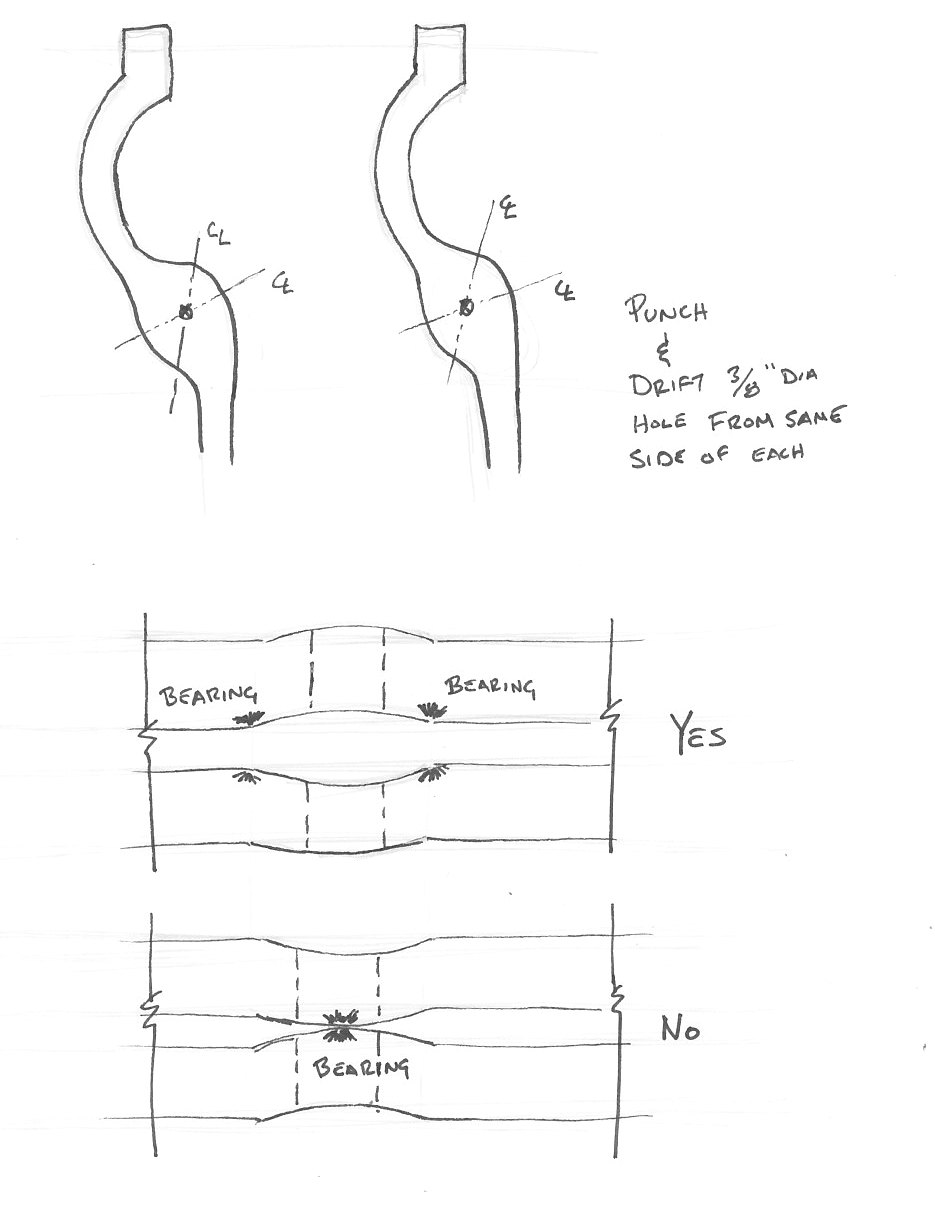
- Use a center punch to identify the center of the bearing face on the same side of each half.
- Punch and drift a 3/8“ hole in the bearing faces from the same side of each face. This creates a slight concaved profile at the mating faces which provides a wider, more stable bearing support.
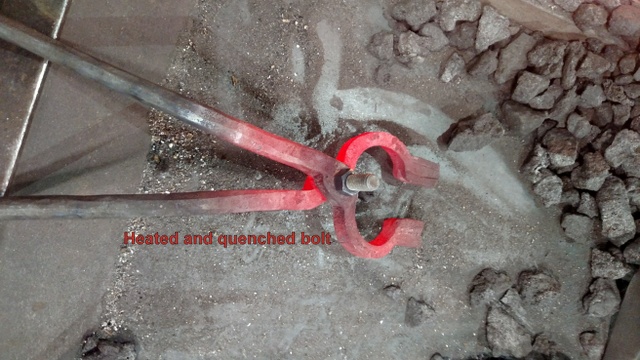
- Use a 3/8” nut and bolt to temporarily hold the 2 halves together (you probably want to have several available as this process usually destroys at least 1)
- Snug the nut and bolt then heat the entire bearing area to red hot. Quench the exposed areas of the nut and bolt then work the tongs open and closed. Then snug the bolt further and repeat until the surfaces are making good contact and there is very little wobbling. The goal here is to smooth and mate the 2 bearing surfaces but no to deform them by tightening the bolt too much.
- Heat just the jaws and clamp the bits in a vise with the desired size stock between the bits. I made these for 3/8“ dia round material. Some tweaking in the arc of the jaws and the alignment of the bits will have to be done.
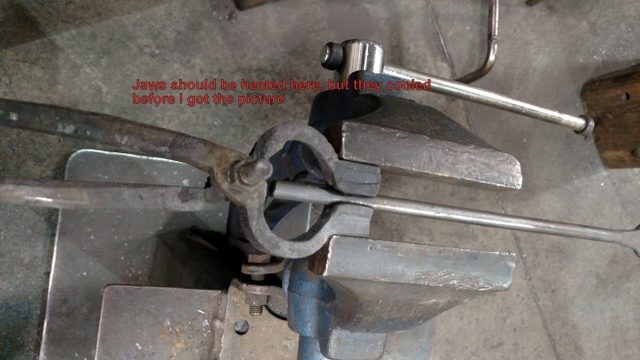
- Tweak the alignment of the bits, jaws, handles.
- Re-tweak what you thought was already good and is now wrong due to tweaking another part.
- Maybe some more tweaking.
- Remove the bolt. Usually its pretty stretched and stripped at this point so I just heated it and wrenched it until it broke in two.
- Now you can either make a rivet or put another fresh bolt in to hold the pieces together.
- To make a rivet start with a piece of 3/8” rod about 1“ longer than the thickness of the tongs at the pivot hole.
- Heat, upset, and round one end of the rod.
- Insert it into the tongs then repeat.. heat, upset, and round then other end.
- For the rounding, I used what looked like a very oversized nailset. The end was concaved to the desired rivet head shape.
- The tongs should be pretty still at this point, so heat up the bearing area again and work the tongs open and closed through the full range of motion as they cool.
- File a crosswise groove at the end of the bit that will securely hold a piece of the desired size stock.
- Clean up the end of the bits with a grinder or file.
- Smile with pride.
