Jan 17 2017, Hydraulic Press Demo
Bob brought in a hydraulic press and some related parts and components to show, mostly from a jeweler's perspective, what this equipment can do.
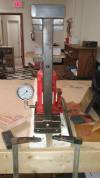
This is a 20-ton standard hydraulic press that has been fitted with a pressure gauge that reads to 10,000 psi. The frame was fabricated locally by Mark Warren at Southern Steel Fabrication.
Bob started the demo/discussion with some comments on working with non-ferrous metals. Most of these will “work harden” which means that as you bend them or beat on them they become less malleable–harder to work and more likely to tear or crack. Additionally, unless you can specify “dead soft” as the state of the metal you buy, most metal will arrive in a hardened or semi-hard state (as is typical of the roofing copper brought in for the demo). To fix this the metal needs to be annealed, which is accomplished by heating to a dull red (just shy of that dull red stage for sterling) with a torch or in a kiln, air cooling just to black, and then quenching in water.
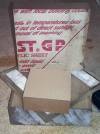
The press gives maximum efficiency when used at the middle of its range. This can be adjusted by screwing the ram into or away from the press, but it is easier to just use spacers. Lots of materials can be used but the common choice is cast acrylic blocks.
These must be cast. Rolled acrylic (like you would get at Lowe's) will flow or shatter. It was noted that any time something that might fail is pressed, safety glasses are essential (and they should probably be worn all the time).
Several processes Bob uses, like making mokume billets, require the metal to be as close to absolutely flat as possible. Pressing annealed metal to a few thousand PSI between two clean acrylic plates accomplishes this nicely.
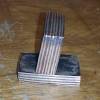
Many operations in the press take advantage of the odd properties of urethane, which seems to flow rather than deform under pressure (albeit reversibly) and can be used to push the metal around. Urethane is available in a variety of hardnesses (durometers) in sheets and blocks. Constraining the urethane in something like the steel cylinder shown directs a lot more of the force into the metal.
We took a ~1“x1”x3“ piece of the softer urethane up to the highest power this press can deliver and it returned to its original shape without any problems. (But pressing sharp objects into urethane at high pressure can lead to cuts in the surface.)
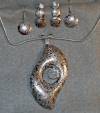
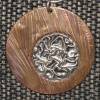
One technique that is not uncommon can be thought of as “forming on air” can create nicely “pillowed” forms as can be seen in this pendant.
To do this, we build a multi-layered sandwich of a spacer, form, metal, urethane pad, spacer. When this is pressed the urethane pushes the metal into the air gap below the form. Typically forms for a few uses can be cut from MDF board although production forms are often done in steel or acrylic with metal-reinforced edges.
To get these types of forms to have any significant depth often requires pressing in multiple stages with annealing steps between (2000psi, anneal, 400psi, anneal etc). Bob was unable to get a copper form to fail on demand, but here are some thinner sterling pieces that were pushed a little too hard.
These “formed on air” shapes can be taken further to create pieces like this pendant.
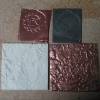
Also employing urethane, another range of techniques involve the use of “semi conforming dies” where the metal is forced into a shaped die rather than pillowed into a cavity. Pewter works very well in this kind of approach, but it can also be demonstrated with thin foils. Top in this picture is a piece of steel that was etched with the makers logo (it's a poor example as it was done far too quickly to be ready for the demo, but it shows the technique. Bottom is a 3D printed digital elevation map of the confluence in Canyonlands National Park in Utah (printed in shapeways white, strong and flexible). When embossing a harder urethane (cream or blue) will give sharper results.
The printed form is interesting. It does not have a flat bottom, so the underside was placed on cream urethane and the metal covered with the slightly softer blue. Under these conditions it survived 4000 psi without problems, although at 5000 psi there was some powder left on the bottom urethane pad.
Not demonstrated, the next step up in die forming is to use “fully conforming” dies. This is where the top and bottom parts are matching dies with just enough space left between them for the thickness of metal being used. Conforming and semi-conforming dies might be cuttable on the CNC if we can figure appropriate speeds and feeds for machining cast acrylic. Maybe.
These are disk cutters. A lot of jewelry has circular components because they are quick and easy to make with this equipment. Put a piece f annealed metal between the plates, insert the cutter, whack it with a hammer. This tool could also be used to make custom mechanical shims in brass…
But when the cutter is over 1” in diameter it is close to impossible to strike it with enough force with a hammer and keep the blow perfectly true. And the dies damage easily. So for larger cutters (1 7/8“ on right) and for cutters that are not discs (you can get ovals, hearts, squares, etc but they are expensive) the press is a far better option for keeping the forces aligned.
Finally, related to disk cutters, Bob brought in a pancake die. This one is not finished as it still needs to be heat hardened and tempered, but using foil it could be demonstrated. Pancake dies are pretty challenging to cut by hand but there are services that will make them quite affordably and they are a good solution when a lot of flat, shaped parts are needed.
Then we squashed some stuff.
More information on some of these techniques (and others) can be found in this book. https://www.amazon.com/Hydraulic-Die-Forming-Jewelers-Metalsmiths/dp/0963583204 The book, and the press, can live in the space for the next month or so if anyone wants to try something.

